Difficulty
Moderate
Steps
3
Time Required
- First PLA Print 3 steps

In Progress
This guide is currently being written. Reload periodically to see the latest changes.
Tools
No tools specified.
-
-
WORK IN PROGRESS
-
For your first few prints you will print on blue Scotch™ brand painter's tape. Not all painter's tape is the same and the Scotch brand is 100% reliable so don't skimp. If you purchased PEI, do not install or print on it yet. You do not want to damage it while you learn.
-
If you already installed the PEI, simply turn the glass bed over so the glass side is facing up - that's better than putting the tape on the PEI.
-
Load the filament on the spool as shown in the photo. It is important that the spool can rotate freely so filament can be pulled off by the extruder.
-
Clean the glass bed. Isopropyl alcohol (IPA) wipes or simply isopropyl alcohol and paper towels work well to remove grease and dirt. Don't touch the glass after you clean it.
-
Place a 150mm (6") strip of painter's tape in the center of the bed aligned with the Z tower. Then place a strip on both sides as shown in the second photo.
-
Make sure the tape is adhered and isn't wrinkled then clean it with IPA.
-
One big advantage of printing on tape is it is cheap and easy to replace. If you didn't install it correctly, simply remove and re-install it.
-
-
-
Connect to your printer via the Duet Web Control (DWC).
-
Bring the hot end up to 195°C and the bed up to 55°C by entering these target temperatures in the Heater 1 and Bed fields. One the printer reaches temperature, allow it to equilibrate for at least 5 to 10 minutes before starting a print.
-
Just because the thermistor is reading your set temperature does not mean that the entire bed is at that temperature yet. The bed is a large mass of aluminum and glass and it takes at least five minutes for the glass surface to actually get up to temperature. Remember this whenever you print, many first layer adhesion problems go away if you wait.
-
-
-
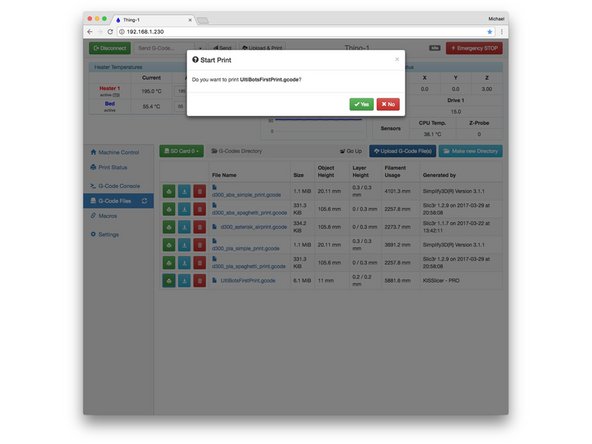
Navigate to the G-Code Files page and select the UltiBotsFirstPrint-PLA.gcode file. Click the Yes button to start the print.
-
The D300VS will first run the auto-calibration routine and then start the print.
-
Once the print starts, watch it closely. First you'll notice that a single line of filament is printed around the part. This is called a skirt and is used to fill prime the hot end for printing. The skirt might start a little poorly but by the time it completes, the filament should be flowing smoothly and the skirt should stick to the blue tape.
-
Next the printer lays down three loops or perimeters around the outside of the part. Then it fills these in with what's called a shell layer.
-
This very first layer is special and is the most critical to print. It is the foundation for the rest of the print so it must be smooth and strongly adhered to the bed. The second photo shows a what a great first layer looks like.
-
This print has two shell layers, then you'll notice that it prints the perimeters but fills them in with smooth back-and-forth strands with gaps between them. This is called infill. This continues until the near the top of the print. Then, two more shell layers are printed.
-