
Difficulty
Moderate
Steps
7
Time Required
12:00:00 - 20:00:00
- D300VS Plus Build Notes 7 steps

In Progress
This guide is currently being written. Reload periodically to see the latest changes.

User-Contributed Guide
This guide is not managed by the site's staff.
Introduction
It is difficult to make a guide on a machine that always being improved on, I want to make this guide to be more general and point to specific sub guides depending on what you have or choose.
At this time I am still building my 'Plus" and listing the differences from the D300VS Build Guide as I go.
I was following the D300VS guide when I am trying to build the 'D300VS Plus' and found I was redoing things because of the differences. might be a good idea to print it out so you can write on it and cross off what not to do.
All Guides can be found here: D300VS Build Guide
Below steps are differences The D300vs Plus had from this guide
-
-
Bottom Frame - there is a step to add 3 t-nuts to top slot of X rail. add an extra one to have 3 on Z too. This is because the wire whip might go to the right depending on how you like to orientate The Aero Titan or maybe want to mount a lamp or camera on the other.
-
Tower height is different, don't cut T-slot covers at the time of endstop wiring. do it later (TBD)
-
after installing LED wiring, you might want to add tape or dull the sharp edge where wire comes down out of vertical extrusion. I believe over time it will cut through the insulation shorting it.
-
Install the top on the towers FLUSH, because the belt tensioning is done on the carriage now.
-
If you plan on mounting the Paneldue, add 2 t-slot nuts to the slot facing up on the Y assembly of the top cross frame member (Steps 18 & 19).
-
-
-
This is the carriage on the 'Plus'.
-
Carriage assembly: see this guide DRAFT... D300VS-PLUS Ball Cup Adjustable Carriage Assembly
-
The tensioner is on the top and belt tip should be flush in it. Excess will be on the other end.
-
The tensioner needs to be mostly in the dovetail grove and never stick out more than 1mm, it will hit the endstop bracket not triggering the endswitch.
-
The EasyTension App may or may not work for you (depending on phone?) . Or if you have a good ear, listen to what it sound like , on this website OnlineToneGenerator set to 39Hz
-
a tool to help make all belts the same tension https://www.thingiverse.com/thing:223059...
-
see second photo for how to get tool on bolt to adjust tension.
-
-
-
Even though I had some experience with another board but, I still got confused, so many bits of information pointing different directions, mostly because I kept getting directed to 'Upgrade' forum posts. Use the Build Guide for details, but if you're getting overwhelmed take a break and see the notes below.
-
1. Copy files to Duet SD card. Get and unzip The D300vs Plus firmware : from GitHub here
-
2. Software on PC is needed to communicate with Duet board via USB. you will need to use this to send commands to it to get Duet to connected to your network and access web interface.
-
This is the instructions for above 'Getting Connected to the Duet Wifi' Only read the content 1 & 2 , ignore the stuff for 1.18 and after, this is where my head jus .t . . . % ( #@!
-
If your Duet already has RRF 1.19.2 installed you only need to copy the 4 folders from the latest 1.19.2 ZIP (gcode, macros, sys, www) onto the SD card installed on the Duet and restart/repower the controller. See the Duet Guide for instructions on getting the version and connecting via wifi
-
-
-
If you got the D300VS 'Plus', it comes with the Aero Titan.
-
still in draft but see DRAFT... D300VS-PLUS Effector and Aero Titan Assembly
-
do not over tighten the heatsink bolts, just barely snug, I found it binds the gear from turning. see more here https://e3d-online.dozuki.com/Guide/Tita...
-
I had to go redo it. It was binding. I did not get pinion gear low enough, it looked flush but wasn't. you should be able to turn that big gear with your pinkie when assembled.
-
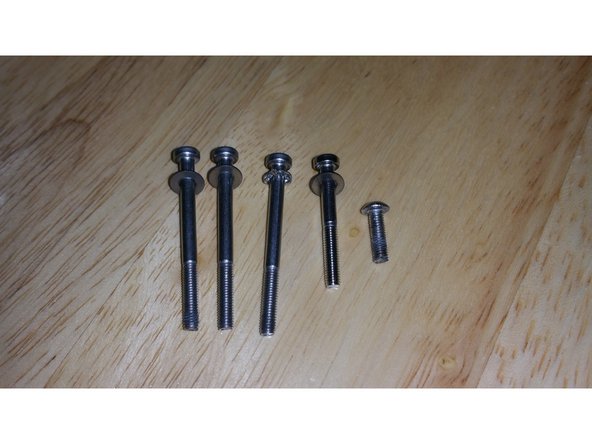
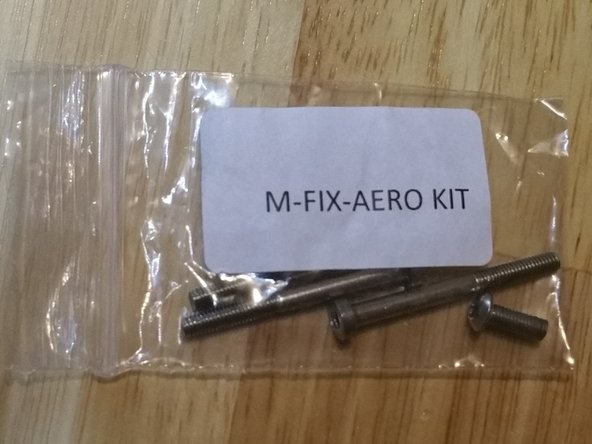
Until the effector gets updated, check first! You will need to cut the 12mm bolt down to 10.5mm or get a M3x10 , also put 1 washers under each of the 4 long bolts. There was a bag with bolts, labeled M-FIX_AERO KIT, see third photo. but were too short.
-
I extended my wires and probably did not have to, it was so close. If I did the wire support on effector as shown in photo above, it would of reached. Or it depends on which side you have the wire whip going.
-
if you find your extruder stepper moving backwards edit the config.g, change M569 P3 S1 to M569 P3 S0
-
-
-
Tusk part cooling :http://www.sublimelayers.com/2017/10/tus...
-
the nuts didn't want to fit in recessed space on cooling duct but I used a short bolt to pull in it, plastic seemed to give and the nut did press in.
-
-
-
Extruder feed calibrations: https://www.youtube.com/watch?v=0Mnq5SfX...
-
Simplify 3d Slicer settings, someone posted in forum: "For some reason, Simplify 3D defines the bed size for a Delta using the size of a square inscribed in the circle of the bed. The correct dimensions for the bed in S3D are 205 x 205 x 440 with the origin at 102.5, 102.5, 0."
-
-
-
There are left over parts including connectors with pins that looks like it is for the duet, I was waiting to the end of my build to see if was called for and wasn't, I will be going back to install them.
-
It's nice that these connectors locks in so it can not vibrate out. It would be very bad if one of the stepper motors gets disconnected while in operation, I know some stepper drivers will burn up with no load on them.
-
New line.
-


I want to help make it easier for next guy.
I want to help make it easier for next guy.
Cancel: I did not complete this guide.
3 other people completed this guide.
One Comment
Great help… I will incorporate your notes into the PLUS guide. Thanks - Brad